Emergency Busway Replacement Helps Restore Building Power in 20 Hours

A major busway failure can turn into a building-wide problem very quickly.

Earlier this year, an electrical contractor contacted EMSCO after a catastrophic busway failure at a 17-story student housing complex in Minnesota. The failure had knocked out power to roughly half of the building, creating an urgent situation and the possibility that residents could need to be displaced if power could not be restored.

The contractor needed compatible replacement busway — and needed it quickly.

Matching Busway Located Within 15 Minutes

The contractor provided EMSCO with the existing busway type and part number.

Within approximately 15 minutes, our team had located matching busway in inventory.

That initial search was only part of the job. As the contractor continued investigating the failure, the full scope of the repair was still developing. Additional busway or related equipment could have been needed as the work progressed.

EMSCO stayed available throughout the process, including over the holiday weekend, so the contractor could quickly check availability if the repair requirements changed.

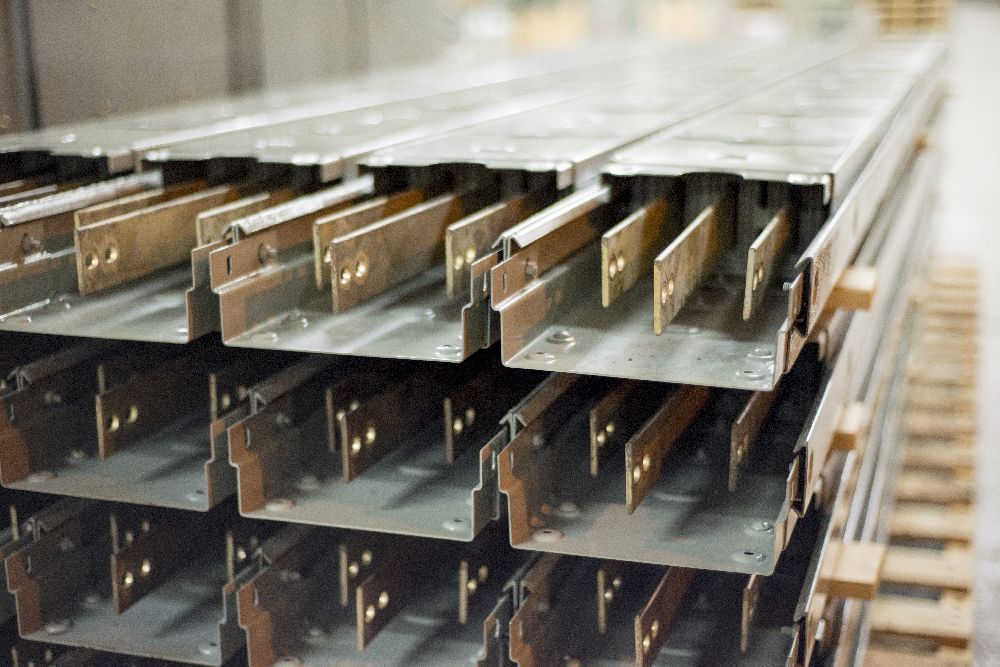
Bus duct inventory with exposed copper bus bars at EMSCO

Bus duct inventory at EMSCO in Minnesota.

Building Power Restored Within Approximately 20 Hours

With the required replacement equipment available, the contractor was able to make the temporary repair and restore building power within approximately 20 hours.

EMSCO did not perform the electrical repair. Our role was straightforward but critical: help identify the existing equipment, find compatible bus duct in stock, and get it ready quickly.

That can be especially important with older electrical distribution systems.

When existing busway fails, the original product may be obsolete, current production may have long lead times, or a direct new replacement may not be readily available. Finding compatible existing equipment can sometimes be the fastest path toward getting a facility operating again.

Replacement Busway When Downtime Can't Wait

EMSCO maintains a large inventory of used, surplus, obsolete, and professionally reconditioned busway, bus plugs, tap boxes, and related power distribution equipment.

Our inventory includes equipment from major current and legacy product lines, giving contractors and facility teams another option when the equipment already installed in a building needs to be matched.

If the repair also requires a plug or additional distribution equipment, EMSCO stocks a wide range of replacement bus plugs for current, legacy, and obsolete busway systems.

When an outage is measured in hours rather than weeks, having the right equipment already on the shelf can make a major difference.

Need Help Identifying Existing Busway?

If you're trying to replace existing busway or other hard-to-find electrical equipment, send us what you have.

A manufacturer, series, catalog number, part number, or clear photo of the equipment nameplate can often give our team a place to start.

Send Us the Nameplate. Find Your Replacement.

What Goes Into Configuring a 4000A Electrical Distribution Lineup?

Selling the equipment is only part of the job.

A large electrical distribution lineup may need to meet a very specific combination of amperage, voltage, breaker sizes, protection functions, physical configuration, and other project requirements before it is ready to ship.

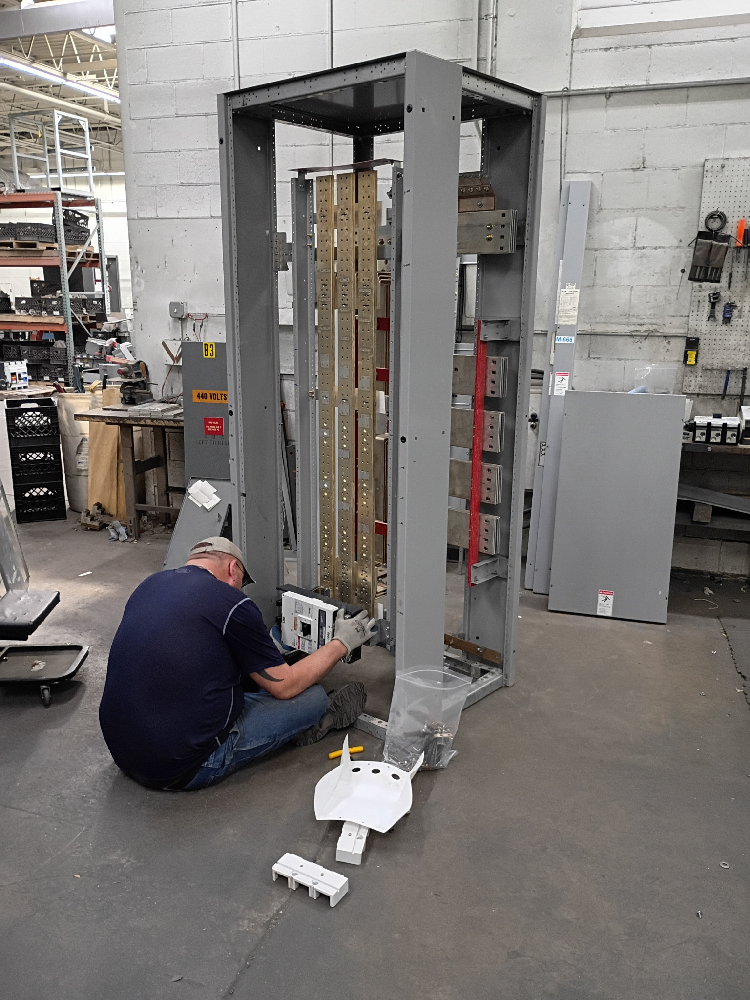
This 4000-amp Eaton distribution lineup is a good example. The equipment is being configured in the EMSCO shop around a customer-specific breaker schedule, including a 4000A main breaker and feeder breakers ranging from 60A to 1200A.

And like many real-world projects, the requirements changed while the work was underway.

Eaton 4000A electrical distribution lineup being configured in the EMSCO shop
An Eaton 4000A distribution lineup being configured in the EMSCO shop to meet a customer-specific breaker schedule.

The basic lineup requirements

The project called for an Eaton main-breaker distribution lineup with the following specifications:

  • 4000A
  • 480/277V
  • 3-phase
  • 4-wire
  • NEMA 1 enclosure
  • 3-pole breakers
  • 65k AIC-rated breakers
  • 4000A main breaker
  • Bottom-feed configuration

The main breaker also included LSIG protection and an energy-reduction maintenance switch. A surge protective device was also included in the lineup.

Projects like this are part of the larger range of low-voltage switchgear and distribution equipment EMSCO supplies and supports.

Configuring the breakers

The main breaker is only one part of a distribution lineup.

The customer also required a specific combination of feeder breakers. For this project, the breakers included:

  • 1200A
  • 800A
  • 600A
  • 200A
  • 150A
  • 60A

Multiple breakers were required at several amperages.

That means the lineup has to be configured around more than total amperage alone. Breaker frame sizes, mounting positions, available space, bus configuration, protection requirements, and the required feeder arrangement all have to work together.

The breaker schedule for this project was also revised while the equipment was being prepared.

That is part of working with electrical equipment for existing facilities and changing project requirements. A lineup may need to be adjusted as final load requirements, feeder sizes, or project scope are confirmed.

What do LSIG and AIC mean?

Specifications like these can have a major impact on whether a breaker is suitable for an application.

LSIG refers to four breaker protection functions:

  • Long-time
  • Short-time
  • Instantaneous
  • Ground fault

Different applications may require different combinations of these trip functions.

AIC, or ampere interrupting capacity, indicates the level of fault current a protective device is rated to safely interrupt.

For this project, the breakers were specified with a 65k AIC rating.

These are the kinds of details that matter when replacing, matching, or configuring industrial circuit breakers and existing power distribution equipment.

Used breakers — tested and documented

This project also demonstrates an important distinction when sourcing used electrical equipment.

The specification did not simply call for used breakers. It called for used breakers that were load tested with test reports.

For equipment like this, condition and verification matter. Testing provides documentation associated with the equipment rather than simply supplying a breaker pulled from inventory with no supporting test information.

EMSCO stocks used, tested, and refurbished circuit breakers across a wide range of manufacturers, amperages, voltages, and configurations.

Why existing electrical equipment often requires more than a part number

Large distribution equipment is rarely as simple as searching for a single catalog number.

When replacing, expanding, or modifying an existing system, important details can include:

  • Manufacturer and equipment family
  • System voltage
  • Amperage
  • Phase and wire configuration
  • Breaker frame and trip rating
  • Interrupting rating
  • Trip functions
  • Bus configuration
  • Feed direction
  • Physical dimensions
  • Breaker quantity and arrangement

That becomes especially important when the equipment is older, obsolete, or no longer readily available new.

Sometimes the solution is an exact replacement. Other times, the equipment needs to be sourced, inspected, tested, reconditioned, or configured around the customer's existing system.

Having deep in-stock electrical equipment inventory, product knowledge, and in-house capabilities under one roof makes those projects easier to solve.

What happens after the sale

This Eaton lineup is a good example of what can happen after the equipment is sold.

The final product still has to match the actual project requirements before it leaves the shop. That can mean installing the correct breakers, adjusting the configuration when specifications change, verifying the equipment, and preparing the lineup for shipment.

This is not the only 4000A Eaton equipment EMSCO has worked with. You can also see a different application in our project on a 2600 kVA transformer and 4000A Eaton switchboard package.

EMSCO has spent over 75 years helping contractors, facility managers, electricians, and purchasing teams find difficult-to-source industrial electrical equipment. You can learn more about why customers turn to EMSCO when availability, compatibility, and lead time matter.

Need help with a distribution lineup or replacement equipment?

If you need help identifying or sourcing a distribution lineup, switchboard, circuit breaker, bus plug, or other replacement electrical equipment, send us the manufacturer, catalog number, specifications, or a clear photo of the equipment nameplate.

Request a quote or contact the EMSCO team.

Find. Fix. Fast.

Low-Voltage Dry-Type Transformer Installation: What to Check Before Energizing

Installing a low-voltage dry-type transformer involves more than making the primary and secondary connections. Location, ventilation, mounting, conductor connections, grounding, and even how the transformer is handled before installation can affect safe and reliable operation.

Eaton's Instructions for Installation, Operation, and Maintenance of Dry-Type Distribution Transformers provides a useful checklist of considerations installers should address before energizing a transformer.

The following is a practical overview based on those manufacturer recommendations. Always follow the instructions and nameplate information for the specific transformer being installed, along with applicable electrical codes. Transformer installation should only be performed by qualified personnel.

1. Inspect the Transformer Before Installation

Installation starts when the transformer arrives—not when the wiring begins.

Before moving or installing the transformer, inspect it for possible shipping damage and verify the shipment for shortages.

Dry-type transformers also need to be handled carefully. Eaton specifies that transformers should be moved in the upright position using appropriate material-handling equipment.

For ventilated transformers, the manual provides procedures for lifting from the core frame using appropriate lifting equipment or moving the unit with a forklift. Encapsulated transformers over 2 kVA have lifting brackets and may also be moved with a forklift when supplied on a pallet.

If a transformer will be stored before installation, Eaton recommends keeping it in its original shipping carton indoors in a clean, dry, temperature-stable environment.

2. Choose the Installation Location Carefully

Where the transformer is installed matters.

The transformer should be located where qualified personnel can safely access it for inspection and future service. Eaton also directs installers to follow NEC Article 450 and applicable local codes when locating and installing the equipment.

According to the manufacturer, the location should be:

  • Well ventilated
  • Free from excessive moisture
  • Free from excessive dust and dirt
  • Away from explosive or corrosive gases and vapors
  • Secured against access by unauthorized personnel

The transformer should also be installed as part of a properly protected electrical circuit and should not be subjected to voltage surges without appropriate protection.

Finally, make sure the mounting surface is capable of supporting the weight of the transformer.

3. Don't Overlook Ventilation and Clearance

Ventilation is especially important with ventilated dry-type transformers because they depend on the surrounding air for cooling.

Follow the minimum clearance specified on the transformer's nameplate and keep the enclosure's ventilation openings unobstructed.

Pay particular attention to ventilation openings at the top and bottom of the enclosure. Placing the transformer in a confined location or blocking these openings can interfere with airflow.

Operating temperature also matters. Eaton's guidelines specify that ambient temperature should not exceed 40°C (104°F), with the average air temperature during a 24-hour period not exceeding 30°C (86°F).

Operation at higher ambient temperatures may require reducing the transformer's kVA load. Eaton refers users to NEMA ST-20 for additional guidance.

4. Verify the Correct Mounting Orientation

Mounting requirements aren't identical for every dry-type transformer.

Ventilated transformers should be installed upright.

Encapsulated transformers intended for indoor use may allow other mounting positions. However, Eaton specifies that an encapsulated transformer must be installed upright, with the top pointing upward, to maintain a Type 3R, Type 12, Type 4, or Type 4X enclosure rating.

Always check the transformer's nameplate, enclosure rating, and manufacturer instructions before determining the mounting arrangement.

5. Consider Vibration and Transformer Sound

Some transformer noise is normal. Alternating magnetic flux in the core creates vibration, which can be transmitted from the transformer into the surrounding structure.

Where and how the transformer is installed can make that sound more noticeable.

Eaton recommends several measures to help minimize sound transmission:

  • Avoid locating the transformer near corners, walls, and ceilings when possible.
  • Use sound-absorbing material when installation near these surfaces cannot be avoided.
  • Use flexible conduit for transformer connections.
  • Locate the transformer away from areas where noise may be a concern.
  • Consider vibration isolators between the transformer and its mounting surface.

These considerations can be particularly important when a transformer is installed near occupied areas where normal transformer hum may become disruptive.

6. Make Connections According to the Nameplate

The transformer nameplate and wiring diagram should guide the electrical connections.

Eaton recommends cleaning electrical joints before making connections and connecting the primary wiring to the correct terminals shown on the transformer nameplate.

Connector selection should correspond to the conductor type and size being used. Connections should be tightened according to the connector manufacturer's torque recommendations.

During installation:

  • Remove the appropriate access panels to reach the wiring compartment.
  • Avoid top cable entry.
  • Clean electrical joints.
  • Connect the primary to the terminals identified on the nameplate.
  • Insulate unused tap leads.
  • Verify that tap connections are tight.
  • Check connections for tightness before completing the installation.

Don't make connections that aren't shown on the transformer's nameplate or wiring diagram.

7. Know Whether the Transformer Can Be Reverse-Fed

Don't assume that a transformer can simply be connected in reverse because the input and output voltages appear suitable.

Eaton specifically identifies transformers labeled "Bi-directional" as suitable for reverse feeding, sometimes called backfeeding.

Reverse feeding introduces additional considerations. Eaton warns that it may result in higher-than-normal inrush current and nuisance tripping of overcurrent protective devices. The manual calls for time-delay circuit breakers or fuses when reverse feeding and provides specific restrictions involving wye neutrals and center-tapped delta connections.

Follow the manufacturer's wiring instructions for the specific transformer rather than relying on voltage ratings alone.

8. Ground the Transformer Properly

Grounding is another essential part of installation.

Eaton instructs installers to connect a grounding conductor to the transformer enclosure as required by the National Electrical Code. The transformer core is grounded to the enclosure.

For reverse-fed applications, the manual specifically directs installers to follow NEC Article 250 system-grounding requirements.

As with the rest of the installation, grounding requirements should be determined from the specific equipment, system configuration, applicable codes, and manufacturer instructions.

9. Check for Moisture Before Energizing

For ventilated transformers, Eaton recommends checking for evidence of moisture before energization.

If moisture is present, the manufacturer's instructions call for drying the unit using an oven or heated airflow. The temperature should not exceed 110°C (230°F) to prevent damage to the transformer's insulation.

This is another reason the storage and installation environment matter. Transformers should be kept clean and dry before being placed into service.

10. Verify Voltage Before Completing the Installation

Once the appropriate connections and checks have been completed, Eaton's procedure calls for energizing the transformer and measuring the secondary voltage to verify the output.

The primary circuit is then de-energized before the secondary wiring is connected according to the nameplate wiring diagram.

Before placing the transformer into normal operation:

  • Verify connections against the nameplate and wiring diagram.
  • Check that connections are tight.
  • Confirm the correct secondary voltage.
  • Make sure unused tap leads are properly insulated.
  • Verify grounding.
  • Reinstall all access panels.

Connections or taps should never be changed while the transformer is energized.

Start With the Transformer Nameplate

Dry-type transformers can look relatively straightforward from the outside, but differences in voltage, kVA, taps, enclosure, winding configuration, and application can significantly affect installation.

The nameplate is also one of the most important references when you're trying to identify a replacement transformer.

When sourcing a replacement, record as much information from the existing nameplate as possible, including:

  • Manufacturer and catalog or model number
  • kVA rating
  • Primary voltage
  • Secondary voltage
  • Phase
  • Frequency
  • Winding configuration
  • Available taps
  • Impedance
  • Enclosure rating

Physical dimensions and the available installation space can also be important when replacing existing equipment.

Having this information available makes it much easier to narrow down equipment that meets the electrical and physical requirements of the application.

Installation Is Only the Beginning

Dry-type transformers generally require relatively little maintenance, but that doesn't mean they should be ignored after installation.

Eaton recommends periodic inspection. Among the items covered in its maintenance guidance are dust and dirt around terminals and ventilation openings, the condition of insulators and terminals, connection and tap tightness, grounding connections, and evidence of moisture in ventilated units.

These inspections should be performed with the transformer de-energized and cooled, with appropriate lockout procedures and qualified personnel.

Looking for a Replacement Low-Voltage Transformer?

EMSCO stocks low-voltage transformers for commercial and industrial power distribution applications.

When replacing an existing transformer, have the nameplate information available—including kVA, primary and secondary voltage, phase, winding configuration, taps, enclosure rating, and dimensions. These specifications provide a much better starting point for identifying equipment that meets the electrical and physical requirements of the application.

If you don't see the transformer you need listed online, contact EMSCO. Our website may not reflect our full in-stock inventory, and our team can check current availability and help identify options based on your specifications.

Browse EMSCO's Low-Voltage Transformers

Source

Eaton, Instructions for Installation, Operation, and Maintenance of Dry-Type Distribution Transformers, Publication I.L. P24836G-591H, Rev. 7, February 2024.

The Eaton manual also references NEMA ST-20, IEEE C57.94, NEC Article 450, and NEC Article 250 for additional application and installation requirements.

Important: This article provides a general overview of manufacturer guidance. It is not a substitute for the installation instructions supplied with a specific transformer, applicable electrical codes, engineering requirements, or work performed by qualified electrical personnel.

CP2 vs. CP4 vs. Pow-R-Way Busway: What Fits What?

If you have an older Cutler-Hammer or Westinghouse busway system and need a replacement bus plug, the first question isn't amperage — it's which busway family you actually have.

CP2, CP4 and Pow-R-Way are not universally interchangeable. A bus plug that looks right or has the correct amperage may still be wrong for the busway. Here's what you need to know to identify your system and start looking for the correct replacement.

CP2 vs. CP4 vs. Pow-R-Way at a Glance

FeatureCP2CP4Pow-R-Way
Manufacturer LineCutler-Hammer SAFETYBUSCutler-Hammer SAFETYBUSWestinghouse Pow-R-Way
Introduced197019851971
Plug-In Busbar ConstructionSeparated busbarsSandwichSandwich
CP2 Plug CompatibilityYesYesNo
CP3 Plug Compatibility—YesNo
Pow-R-Way Plug CompatibilityNoNoYes

The most important takeaway: CP4 busway was designed to accept CP2 and CP3 bus plugs. Pow-R-Way is a different busway family, and its plugs are not interchangeable with vintage Cutler-Hammer CP2/CP3/CP4 plugs.

What Is CP2 SAFETYBUS?

CP2 SAFETYBUS was introduced by Cutler-Hammer in 1970. Its feeder busway used sandwich construction, while the plug-in version used separated busbars supported by corrugations in the housing. CP2 also used Mylar-wrapped busbar insulation and a single-bolt bridge joint design.

For someone maintaining an existing CP2 system today, the construction history is less important than correctly identifying the busway and replacement plug.

CP2/CP3/CP4 SAFETYBUS applications included both circuit breaker and fusible units. Eaton's aftermarket documentation lists breaker frames including EHD, FDB, FD, HFD, FDC, JDB/JD, KDB/KD, LDB/LD, MDL/HMDL and several TRI-PAC frames, depending on the required amperage and application.

What Changed with CP4 SAFETYBUS?

Cutler-Hammer introduced CP4 SAFETYBUS in 1985. CP4 moved the plug-in busway to a sandwich design and incorporated 130°C Mylar busbar insulation, a UL-recognized case ground path and the CP3 bridge joint package.

For replacement purposes, however, one CP4 feature matters more than all the others:

CP4 busway accepted CP2 and CP3 bus plugs.

That compatibility is important when you're trying to maintain an older SAFETYBUS installation or identify a plug already installed on a CP4 run.

CP4 Fusible Plug Voltage and Amperage Options

Eaton's aftermarket documentation lists CP4HD fusible switch plug-in units in the following configurations:

  • 240V, 3-phase, 3-wire: 30A, 60A, 100A, 200A, 400A and 600A
  • 120/208V, 3-phase, 4-wire: 30A, 60A, 100A, 200A, 400A and 600A
  • 600V, 3-phase, 3-wire: 30A, 60A, 100A, 200A, 400A and 600A
  • 277/480V, 3-phase, 4-wire: 30A, 60A, 100A, 200A, 400A and 600A

Other SAFETYBUS configurations, including certain bolt-on units and cable tap boxes, extend into the 800A range. That's one reason amperage alone isn't enough to identify the correct replacement.

Browse EMSCO's Bus Plug Inventory »

Where Does Pow-R-Way Fit In?

Westinghouse introduced Pow-R-Way in 1971. Although it dates from roughly the same era as CP2, it is a different busway family.

Pow-R-Way used sandwich construction in both feeder and plug-in busway, along with a bolt-end/slot-end design and single-bolt joint connection. Eaton's history lists Pow-R-Way busway ratings from 600A through 5000A.

But if you're sourcing a replacement plug, remember this:

Pow-R-Way plugs are not interchangeable with CP2, CP3 or CP4 SAFETYBUS plugs.

Eaton specifically warns that plugs for vintage Cutler-Hammer busway, Pow-R-Way busway and Pow-R-Way III busway are not interchangeable.

Browse EMSCO's Bus Duct Inventory »

Don't Identify a Bus Plug by Appearance Alone

Legacy bus plugs can look similar from the outside. That's not enough to determine whether a replacement will fit.

Before ordering a CP2, CP4, Pow-R-Way or other replacement bus plug, gather as much of the following information as possible:

  • Manufacturer and busway series
  • Catalog number, style number or shop order number
  • Voltage
  • Amperage
  • 3-wire or 4-wire configuration
  • Ground and neutral requirements
  • Circuit breaker or fusible configuration
  • Breaker frame and trip rating, if applicable

For bolt-on SAFETYBUS units, additional details may be required, including the type of busway, front or rear mounting, and load-left or load-right orientation.

Not Sure Whether You Have CP2, CP4 or Pow-R-Way?

You don't have to identify it from memory or guess based on the enclosure.

Take clear photos of:

  • The busway nameplate
  • The bus plug nameplate
  • The complete bus plug
  • The plug stabs or connection points, if safely accessible

Send the photos along with any available voltage, amperage, breaker or fuse information to EMSCO. Our team can help identify the busway system and check our inventory for a compatible replacement.

Don't see the exact CP2, CP4 or Pow-R-Way equipment you need online? Our online inventory is only part of what we have available.

Shop Bus Plugs   |   Shop Bus Duct   |   Ask EMSCO to Help Identify It

Powering Recovery: How EMSCO Helped Restore Temporary Power at Skyline Tower

When a fire at Skyline Tower in St. Paul, Minnesota left the high-rise without power, restoring electrical service became an immediate priority.

NAC Mechanical & Electrical Services needed temporary power distribution equipment while permanent repairs were being addressed. They turned to EMSCO to help source the equipment needed to keep the recovery moving.

The Challenge: Temporary Power After a Building Fire

After a major electrical disruption, waiting for new equipment isn't always practical. Contractors may need temporary distribution equipment quickly so restoration work can continue while damaged systems are inspected and repaired.

For Skyline Tower, NAC needed equipment capable of supporting the temporary power plan for the building — and they needed it without the extended lead times that can come with ordering new equipment.

What EMSCO Supplied

EMSCO supplied a Square D 3000A main-lug-only (MLO) distribution panel configured with:

  • Three 800A feeds
  • One 1200A feed

The equipment was sourced from EMSCO's existing inventory and prepared for the project so NAC could keep the temporary-power work moving.

Why In-Stock Equipment Matters in an Emergency

Electrical equipment doesn't always fail on a convenient schedule. Fires, equipment failures, planned shutdowns and construction projects can all create situations where the required equipment is needed faster than normal manufacturer lead times allow.

Having access to existing equipment gives contractors another option.

EMSCO stocks used, surplus, obsolete and professionally reconditioned industrial electrical equipment, including low- and medium-voltage switchgear, circuit breakers, transformers, busway, bus plugs, motor control and other power distribution equipment.

And because not everything in our warehouse is listed online, a website search doesn't always show every option we may have available.

Temporary Power Equipment When the Schedule Can't Wait

Skyline Tower is one example of where existing inventory helped support an urgent project. EMSCO also rents electrical equipment for temporary-power applications, ranging from individual circuit breakers to complete switchgear lineups.

Temporary equipment can be useful for emergency recovery, planned maintenance, construction, equipment replacement and other situations where permanent equipment isn't yet available.

Need Temporary Power Equipment?

If you're working on an emergency, shutdown or temporary-power project, send EMSCO the equipment requirements, voltage, amperage, manufacturer information and any available nameplate photos.

We'll check our inventory and help determine what equipment options are available.

View Equipment Rental   |   Browse Switchgear   |   Contact EMSCO

2600 kVA Transformer + 4000A Switchboard: What to Check Before You Buy

Large electrical projects often require more than finding a transformer with the right kVA rating. Primary and secondary voltage, switchboard capacity, breaker distribution, enclosure type and the requirements of the downstream load all have to work together.

EMSCO currently stocks a 2600 kVA medium-voltage transformer paired with a 4000A Eaton Pow-R-Line switchboard . This type of package may be worth considering for industrial facilities, data centers, cryptocurrency mining operations and other projects with large, concentrated electrical loads.

But the equipment has to match the application. Before purchasing a transformer and switchboard package, here are the specifications and some of the most important items to verify.

2600 kVA Transformer Specifications

The available DB three-phase, pad-mounted transformer is configured with:

  • Capacity: 2600 kVA
  • Primary voltage: 34,500V Delta
  • Secondary voltage: 416Y/240V
  • Phase: 3-phase
  • BIL: 150 kV
  • Fluid: FR3, approximately 537 gallons
  • Windings: Aluminum
  • Installation: Pad-mounted, outdoor
  • High-voltage loadbreak switch: 35 kV, 300A
  • Deadbreak high-voltage bushing: 35 kV, 600A
  • Protection: Bayonet fuse and current-limiting fuse

The transformer also includes multiple primary-voltage tap settings. Exact serial numbers, impedance and other unit-specific information may vary, so confirm the specifications of the available unit before designing around it.

Looking for a different voltage or capacity? Browse EMSCO's medium-voltage transformers or contact us with your project specifications.

4000A Eaton Pow-R-Line Switchboard Specifications

The matching Eaton Pow-R-Line PRL-C switchboard is configured with:

  • Main rating: 4000A
  • Voltage: 415/240V
  • Phase: 3-phase
  • Wire: 4-wire
  • Main breaker: Eaton Magnum SB insulated-case breaker
  • Operation: Electrically operated, 110-125 VAC motor operator
  • Protection: LSIG trip functions with ground fault
  • Arc-flash reduction: Equipped with arc-flash reduction setting
  • Distribution: (48) HFD3080 80A, 3-pole breakers
  • Enclosure: NEMA 3R outdoor
  • Approximate dimensions: 164 in. W × 62 in. D × 91 in. H

If this configuration does not match your project, EMSCO also stocks additional low-voltage switchgear and switchboards in a range of amperages, voltages and configurations.

What Should You Check Before Buying?

A 2600 kVA rating and 4000A main are only part of the specification. Contractors, engineers and facility teams should verify the complete electrical requirements of the project before purchasing.

1. Confirm the Available Primary Voltage

This transformer has a 34.5 kV primary. The available utility or facility distribution voltage must be compatible with the transformer and the planned installation.

Do not start with kVA alone. Start with the power available at the site and the voltage required by the load.

2. Confirm the Required Secondary Voltage

The transformer is configured for a 416Y/240V secondary, while the Eaton switchboard is rated 415/240V, 3-phase, 4-wire.

Verify that the voltage configuration is appropriate for the switchboard, downstream distribution equipment and connected loads. The final electrical system should be reviewed by the appropriate qualified electrical professionals.

3. Calculate the Required Capacity

A 2600 kVA transformer is intended for substantial electrical loads. Proper transformer sizing depends on more than the connected load at a single point in time. Continuous loading, demand, future expansion and other design requirements may affect the required capacity.

An oversized transformer is not automatically the better choice. The equipment should be sized for the actual system and application.

4. Review the Breaker Distribution

The switchboard's 48 80A, 3-pole HFD3080 breakers are an important part of this particular configuration. A 4000A switchboard may have the right main rating while still having the wrong downstream distribution for a project.

Before purchasing, determine how many downstream circuits are required, what breaker sizes are needed and whether the existing distribution matches the planned loads.

5. Confirm the Installation Environment

The transformer is pad-mounted for outdoor installation, and the switchboard uses a NEMA 3R outdoor enclosure.

Site conditions, equipment clearances, foundations, cable or conduit entry, environmental requirements and applicable codes should all be considered before installation.

6. Verify Protection and System Compatibility

Available fault current, interrupting ratings, grounding, conductors, transformer protection and upstream and downstream protective devices must work together as a complete electrical system.

For large power-distribution projects, those requirements should be confirmed before the equipment is purchased rather than after it arrives on site.

What Applications Could Use a Package Like This?

Transformer and switchboard packages in this capacity range may be considered for projects with large or concentrated electrical loads, including:

  • Industrial facilities and manufacturing expansions
  • Data centers and high-density computing facilities
  • Cryptocurrency and Bitcoin mining operations
  • Large commercial or industrial construction projects
  • Facility expansions requiring additional distribution capacity
  • Other high-load applications requiring medium-voltage transformation and low-voltage distribution

The application itself does not determine whether this equipment is a fit. Voltage, capacity, distribution, protection and the requirements of the connected loads do.

Can This Transformer and Switchboard Be Used for Bitcoin Mining?

Potentially, but Bitcoin mining is only one possible application for this equipment.

Mining facilities can create large, concentrated electrical loads, which makes transformer capacity and low-voltage distribution especially important. This package provides 2600 kVA of transformer capacity along with a 4000A switchboard and multiple 80A three-pole distribution breakers.

That does not mean it is automatically the right configuration for every mining project. Available utility voltage, mining equipment voltage, load calculations, distribution design, protection and site conditions all need to be verified first.

Why Source a Transformer and Switchboard Together?

Large electrical projects can turn into sourcing problems when the transformer is available but the required switchboard is not—or when normal manufacturer lead times do not fit the project schedule.

EMSCO maintains a large inventory of used, surplus, obsolete and professionally reconditioned industrial electrical equipment. When compatible equipment is already available, sourcing major components from the same supplier can simplify the search and help reduce the time spent locating individual pieces.

The EMSCO website does not always reflect everything currently in the warehouse. If this exact package is not the right fit, send us the requirements. We may have another transformer, switchboard or configuration available.

What Information Should You Send EMSCO?

The more information you have, the faster we can check the equipment against your requirements. Useful project information includes:

  • Required transformer kVA
  • Primary voltage
  • Required secondary voltage
  • Phase and wire configuration
  • Switchboard amperage
  • Main breaker or main-device requirements
  • Required branch breaker sizes and quantities
  • Indoor or outdoor installation
  • Nameplate photos
  • One-line diagrams, drawings or equipment schedules
  • Required project or shipment date

Availability, condition, exact configuration, serial numbers and testing documentation should be confirmed for the specific equipment being quoted.

Need a 2600 kVA Transformer, 4000A Switchboard or Another Configuration?

Contact EMSCO with your specifications, drawings or nameplate information. Our team can check current inventory and help identify equipment that matches the project requirements.

You can also browse our current inventory of medium-voltage transformers and low-voltage switchgear.

For urgent equipment needs, call EMSCO at 1-800-328-1842.

Find. Fix. Fast.

How to Source Replacement Molded Case Circuit Breakers (MCCBs)

How to Source Replacement Molded Case Circuit Breakers (MCCBs)

Need a replacement molded case circuit breaker (MCCB) for an older system? The fastest way to source the right breaker is to capture the correct nameplate details, confirm true compatibility (not just amps), and work with a supplier that has tested inventory on the shelf.

Specs to capture | How to match compatibility | Why tested/refurbished often wins | Lead times & availability | Quality, standards & warranty | FAQ

* * *

1) Capture the MCCB nameplate details (this prevents wrong orders)

Before you call, quote, or search online, document what’s on the breaker label. These details are what your supplier needs to match a correct replacement quickly. 

  • Manufacturer + model/catalog number
  • Voltage rating (system voltage must match)
  • Amp rating (and frame/series if shown)
  • Trip type / characteristics (thermal-magnetic, electronic trip unit, etc.)
  • Poles (1 [single] / 2 / 3)
  • Interrupt rating (AIC / kAIC) (critical for safety & compliance)
  • Mounting + terminals (bolt-on vs. plug-in, lugs, load-side accessories)
  • Physical dimensions (space/enclosure fit)

Fast-track tip: If anything is unclear, take a clear photo of the label (and the breaker installed in the panel) and send it to your supplier. That’s often the fastest path to the right match.

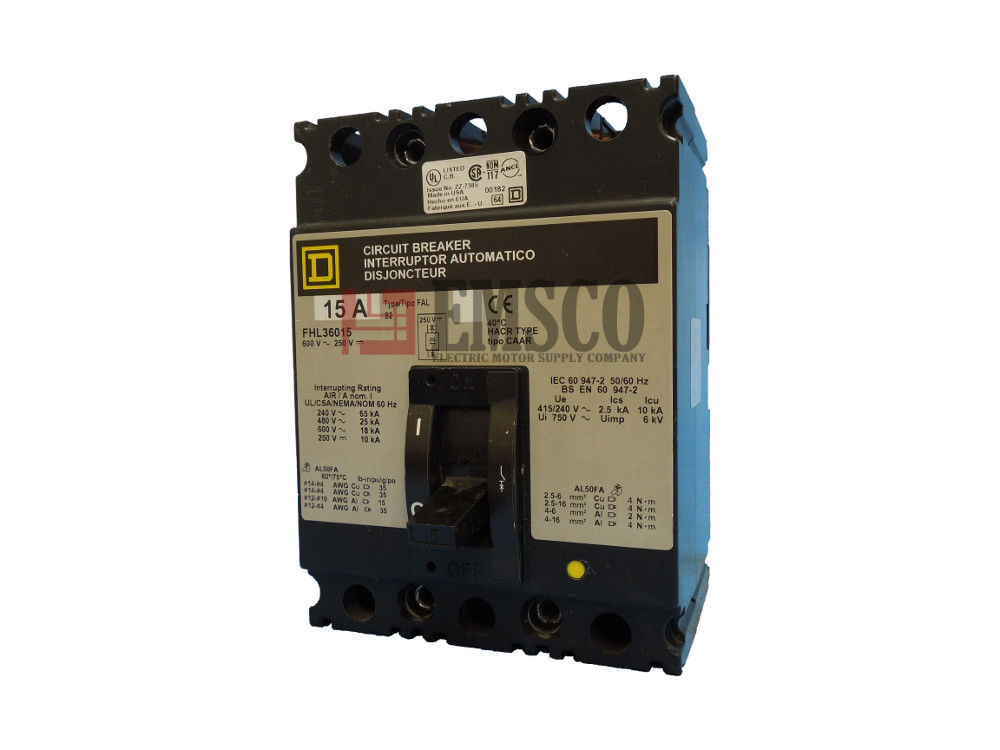
Example of an MCCB nameplate label showing amperage, voltage, and model number
Example: the breaker label is where you’ll find the model/catalog number, voltage, and amp rating.

2) Match true compatibility (not just amps)

Two breakers can share the same amp rating and still be wrong for the application. For a safe, fit-for-purpose replacement, confirm these high-impact items:

  • Voltage class and interrupt rating (AIC/kAIC)
  • Frame/series (especially on legacy gear)
  • Trip unit type and settings compatibility
  • Mounting style and terminal/lug configuration
  • Accessories (shunt trip, aux contacts, alarm switch, etc.) if your system requires them

Best practice: When in doubt, have a qualified electrician/engineer verify compatibility with your panelboard/switchboard and application requirements.

3) Consider tested/refurbished MCCBs when new is expensive or unavailable

For discontinued or hard-to-find MCCBs, used and tested inventory can be a practical solution—often faster and more cost-effective than chasing new old stock.

Why many facilities choose tested/refurbished

  • Lower total cost versus new replacements
  • Shorter lead times when the exact model is obsolete
  • Confidence when parts are inspected/tested and backed by a warranty

If you’re sourcing for critical uptime, ask your supplier what testing/inspection is performed and what documentation is available.

4) Lead time matters: prioritize “in-stock and ready” inventory

Downtime is expensive. Partnering with a supplier that maintains a large, organized breaker inventory can dramatically reduce delays.

EMSCO’s Minneapolis facility includes a 250,000-square-foot warehouse with a large selection of tested MCCBs ready to ship, helping contractors and facilities teams get replacements faster.

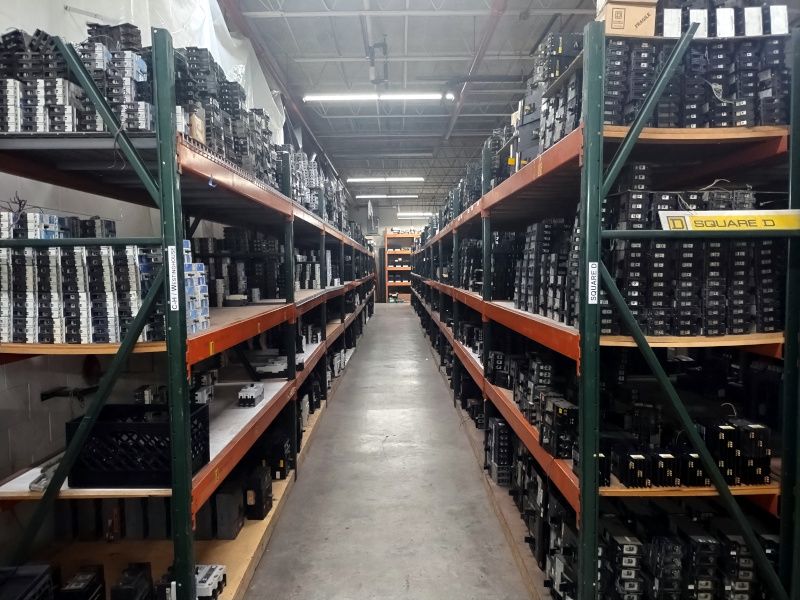
Warehouse aisle with molded case circuit breaker inventory on shelves
In-stock inventory helps shorten lead times and reduce downtime.

5) Verify quality controls, standards, and warranty

Replacement MCCBs must fit correctly and perform safely. Ask about inspection/testing practices and warranty coverage. Suppliers referencing recognized standards (such as PEARL) are signaling an emphasis on process and quality.

Quick buyer checklist:

  • What testing is performed (electrical + mechanical)?
  • Is the unit cleaned/refurbished or simply “pulled and shipped”?
  • Is a warranty included?
  • Can you provide photos and/or test documentation?
Technician inspecting and working on a circuit breaker
Ask what inspection/testing is completed before shipment.

Common mistakes to avoid

  • Ordering by amp rating only (ignoring frame/series, terminals, or mounting)
  • Skipping interrupt rating (AIC/kAIC) verification
  • Not confirming required accessories (shunt trip, aux contacts, etc.)
  • Assuming “close enough” is acceptable on legacy gear

FAQ

What info do I need to match an MCCB replacement?

At minimum: manufacturer, model/catalog number, voltage, amps, poles, trip type, interrupt rating (AIC/kAIC), and mounting/terminal configuration.

Can I replace an MCCB with a different brand or model?

Sometimes—but it must be a verified equivalent that matches the electrical ratings, mounting, and the equipment’s requirements. When in doubt, have a qualified professional confirm compatibility.

Are refurbished/used MCCBs safe?

They can be, when sourced from a reputable supplier that inspects/tests units and backs them with a warranty. Always ask what testing is performed and what documentation is available.

What if I can’t find the model number?

Send clear photos of the breaker label and how it mounts/installs. That often provides enough information for a knowledgeable supplier to identify the correct replacement or equivalent.

Next step

Browse EMSCO’s inventory of molded & insulated case circuit breakers, or contact our team with your breaker photos/specs to get a fast match.

Browse Molded Case Circuit Breakers

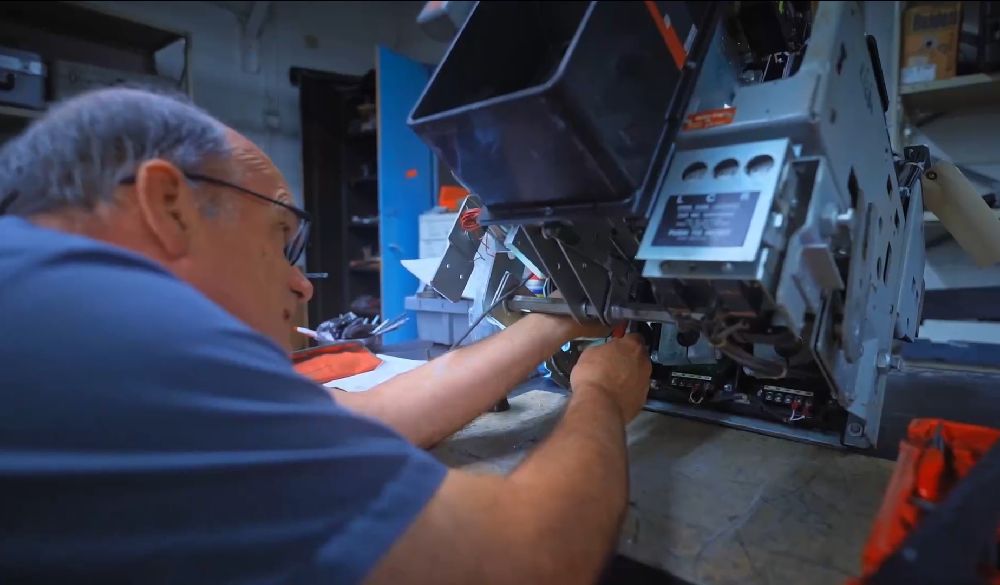
Maximize Efficiency and Savings with Bulldog Busway and Bus Plugs: New, Reconditioned, and Safety-Tested Solutions

Upgrading or replacing your existing busway and bus plugs with Bulldog Busway and Bus Plugs—whether new, reconditioned, or used — brings benefits to your facility.

Reconditioned used or inspected and safety-tested Bulldog bus plugs can significantly lower your investment compared to purchasing new ones. These options provide the reliability and efficiency of new equipment at a fraction of the cost, allowing you to allocate budget to other critical areas of your operations.

Bus Plug Testing and Quality Assurance:

EMSCO Reconditioned used and inspected, safety-tested bus plugs undergo testing processes to meet industry standards and your specific operational requirements. This means you can trust that these components will perform reliably, maintaining the safety and integrity of your electrical system.

Bulldog Bus Plugs In Stock for Reduced Lead Times:

Used and reconditioned Bulldog Busway and Bus Plugs are often more readily available than new ones, which can have long lead times due to manufacturing processes and supply chain delays. This means you can upgrade your busway system faster, minimizing disruptions and keep your business moving.

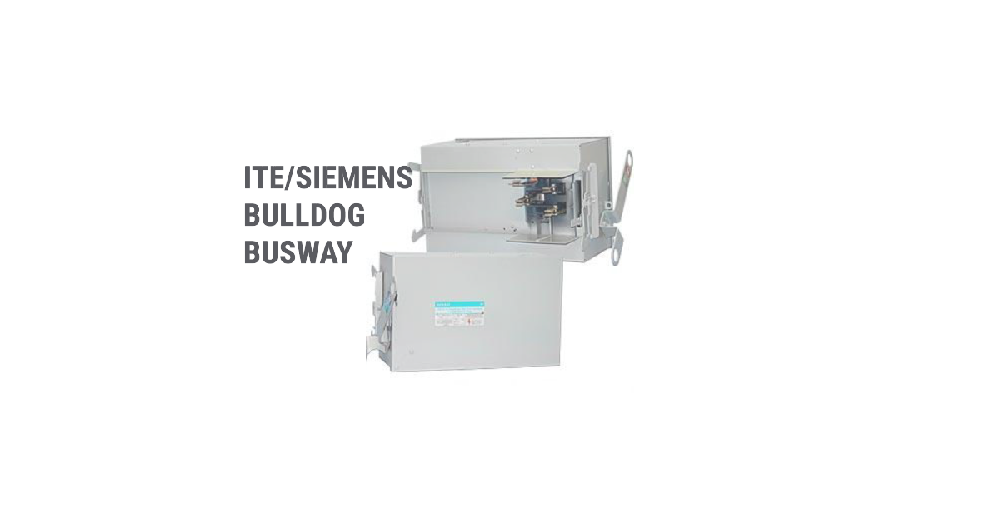
Buyers Checklist Questions for ITE/Siemens Bulldog Bus Plugs

☑️ Amperage

Knowing the available amperage for bus plug options ensures you choose a bus plug that can handle your specific electrical load, preventing overloading and ensuring efficient operation. Selecting the correct amperage rating matching the bus plug's capacity to your system's leads to safety and optimal performance.

☑️ Ground

Review the grounding options provided by ITE Bulldog Bus Plugs. Proper grounding options are essential for electrical safety and system stability, preventing potential hazards and ensuring compliance with safety standards.

☑️ Fusible or Breaker Style Bus Plugs

Choose between fusible and breaker style: Fusible Bus Plugs are ideal for applications where cost is a primary concern, and where high fault current handling capability is needed. Breaker Style Bus Plugs are better suited for applications where minimizing downtime is critical, and where power options are important.

☑️ Voltage

Correct voltage ratings to ensure that the bus plug can handle the electrical potential of your system, preventing mismatches that could lead to equipment failure or safety issues.

☑️ Bus Plug Wiring

Wire compatibility ensures that the bus plug can be securely and effectively connected to your existing wiring, which is critical for maintaining system integrity and performance. This also reduces the risk of faults and improves overall system performance.

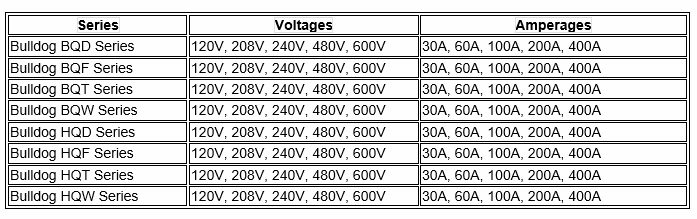
ITE/SIEMENS Bulldog Series Busway Voltage and Amperage

5 Questions to Ask When Choosing Bus Plug Replacements

1. What factors should I consider when selecting the amperage rating for my bus plugs?

Answer:

When deciding on an amperage rating for your bus plugs, keep in mind your system's electrical load requirements, the maximum current the bus plug can carry, and the possibility of future extension. Using the proper amperage rating reduces overloading, improves safety, and extends the life of your electrical components.

2. Should I choose fusible or breaker style bus plugs for my system?

Answer:

Your special needs will determine whether you use fusible or breaker style bus plugs. Fusible bus plugs are inexpensive and can take greater fault currents, but they require fuse replacement after usage. Breaker style bus plugs are resettable and have customizable trip settings, which reduces downtime and increases operating flexibility; still, they are often more expensive upfront.

3. How important is proper grounding for bus plugs, and what options are available?

Answer:

Correct grounding is necessary for electrical safety and system performance. It protects against electrical faults and surges, lowering the risk of equipment damage and providing compliance to safety regulations. To maintain a safe and stable electrical environment, be sure that the bus plugs you purchase have sufficient grounding options that meet the requirements of your system.

4. What voltage ratings should I consider when selecting bus plugs for my electrical system?

Answer:

Check your electrical system's voltage needs for safe compatibility with bus plugs. To guarantee safe and efficient operation, the bus plug's voltage rating must be equal to or greater than the system operating voltage. Common voltage ratings include 120V, 208V, 240V, 480V, and 600V. To avoid malfunctions or safety issues, check whether the bus plugs you choose are capable of handling the voltage in your system.

5. Are there benefits to using reconditioned or inspected and safety-tested bus plugs compared to new ones?

Answer:

These options can provide significant cost savings while still offering reliability and performance equivalent to new components. Reconditioned bus plugs undergo thorough testing to make certain they meet industry standards, making them a practical and economical choice for maintaining and upgrading your electrical system.

Request help online or call a product specialist at 800-328-1842.

Reconditioned, used busway and bus plugs that are inspected and safety tested offer a viable option for your electrical needs. These products go through our evaluation and testing processes to certify they meet safety standards for safety and performance.

Exploring the Basics of Safety Switches and Disconnects: Ensuring Electrical Safety in Your Facility

In any industrial or commercial setting, ensuring the safety of personnel and equipment is paramount. One critical aspect of electrical safety is the proper implementation of safety switches and disconnects. These devices play a crucial role in protecting against electrical hazards, preventing accidents, and facilitating maintenance work on electrical systems and machinery. In this blog post, we'll delve into the basics of safety switches and disconnects, exploring their functions, types, and importance in maintaining a safe working environment.


Understanding Safety Switches and Disconnects

Safety switches, also known as disconnect switches or isolators, are devices designed to quickly and safely disconnect electrical power to a circuit or piece of equipment. They serve as a means of isolating electrical circuits, machinery, or appliances to prevent electric shock, fire, or damage to equipment during maintenance, repair, or emergency situations.

Functions of Safety Switches and Disconnects

Isolation: Safety switches provide a physical break in the electrical circuit, ensuring that no power is supplied to the connected equipment or circuit when in the off position. This isolation is essential for preventing accidental contact with live electrical components.

Emergency Shutdown: In case of electrical faults or emergencies, safety switches offer a quick and reliable means of shutting off power to affected circuits or equipment, minimizing the risk of further damage or injury.

Lockout/Tagout (LOTO): Safety switches are often used in conjunction with lockout/tagout procedures to ensure that equipment remains de-energized during maintenance or servicing, preventing unauthorized activation and safeguarding personnel working on the equipment.


Types of Safety Switches and Disconnects

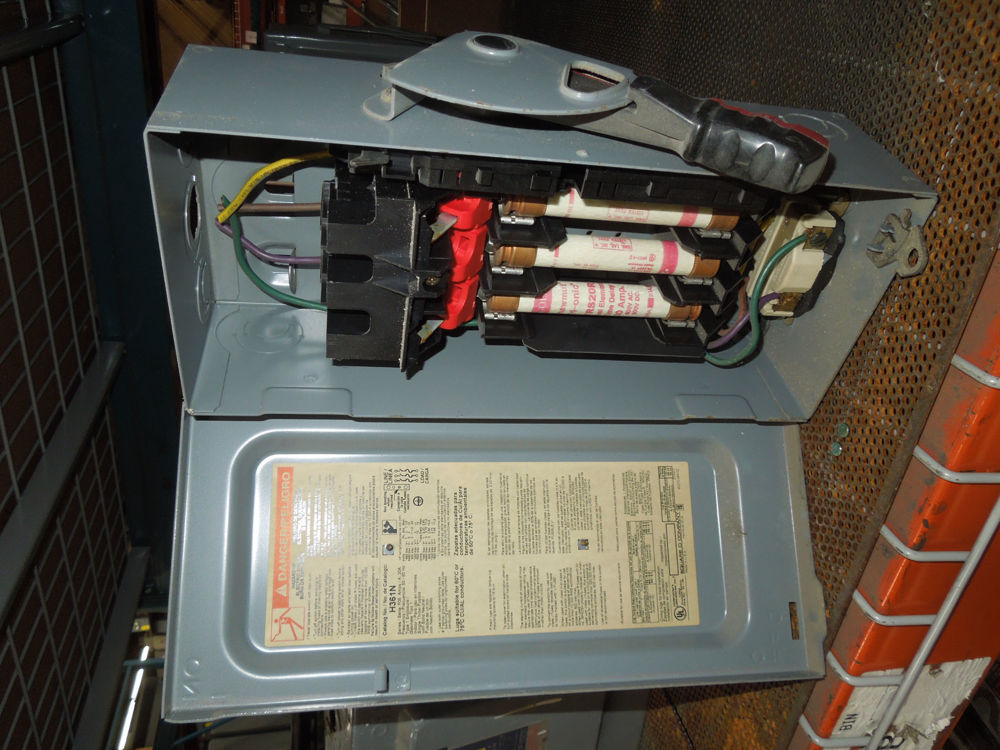
Fused Disconnect Switches: These devices incorporate fuses into the disconnect switch mechanism, providing overcurrent protection when excessive current flows along with the ability to disconnect power, preventing damage to equipment and minimizing safety risks.

Non-Fused Disconnect Switches: Non-fused disconnect switches offer a means of isolating power without the inclusion of fuses. They are commonly used in applications where overcurrent protection is provided elsewhere in the circuit.

Circuit Breaker Disconnects: Circuit breaker disconnects combine the functions of a disconnect switch and a circuit breaker, allowing for both disconnection and overcurrent protection.


Importance of Safety Switches and Disconnects

Electrical Safety: By providing a means of isolating power, safety switches and disconnects help prevent electric shock and electrocution hazards, safeguarding personnel working on electrical systems.

Equipment Protection: Disconnecting power during maintenance or repair activities helps prevent damage to equipment and extends its operational lifespan.

Fire Prevention: Properly functioning safety switches can mitigate the risk of electrical fires by quickly disconnecting power in the event of a fault or overload.

Compliance with Regulations: Many regulatory standards and codes mandate the use of safety switches and disconnects in industrial and commercial settings to ensure compliance with safety requirements and prevent accidents


Key Considerations When Choosing Safety Switches

Voltage and Amperage Rating: Select safety switches that match the voltage and amperage requirements of the electrical system they will be protecting.

Enclosure Type: Consider the environmental conditions (e.g., indoor, outdoor, hazardous locations) when choosing the appropriate enclosure type for the safety switch and select the appropriate NEMA rating for the disconnect switch.

Fused or Non-Fused: Ensure that you select the correct type for the applications of your electrical system.


Conclusion

Safety switches and disconnects are indispensable components in electrical systems, serving to protect both personnel and equipment from electrical hazards. Understanding their purpose, types, and key considerations is essential for ensuring a safe and compliant electrical environment. By prioritizing safety and selecting the right safety switches for your application, you can mitigate risks and create a secure work environment. Remember, when it comes to electrical safety, there's no room for compromise.


Shop the largest selection of used and reconditioned safety switches

Beyond The Big Brands: Regional Switchgear Manufacturers

Switchgear is the backbone of any electrical system, and at EMSCO, we understand the importance of having access to a comprehensive selection of high-quality switchgear components. Whether you need an entire switchgear line-up or specific circuit breakers with mounting hardware, EMSCO is your one-stop solution for all your low-voltage switchgear requirements.

Why Choose EMSCO? Here’s What Makes Us Stand Out

It’s simple: we don’t just carry an extensive selection of major brands; we go beyond, stocking trusted products from standout regional switchgear manufacturers. Our inventory doesn’t just offer variety; it offers versatility. Whether you’re working with vintage components or cutting-edge models, we make it easy to find exactly what you need from brands both big and small.

Some of the respected regional names we carry include:

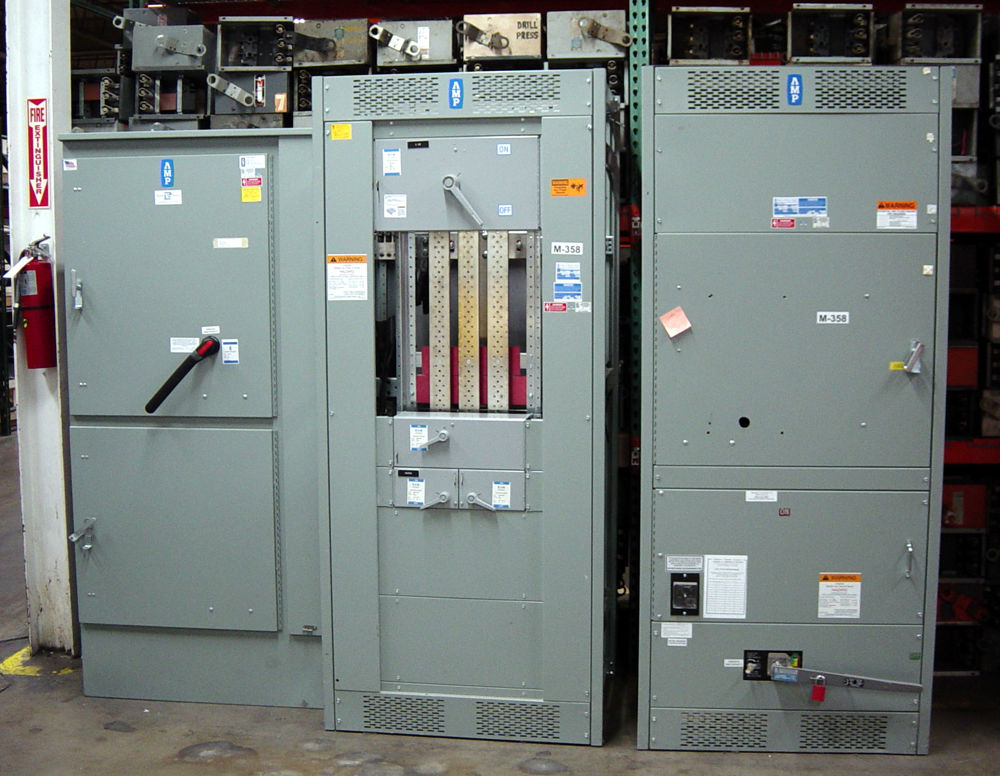
  • Peterson Electric Panel
  • American Midwest Power (AMP)
  • Electro-Mechanical Industries (EMI)
  • Kinney Electrical Manufacturing Co. Inc.
  • Illinois Switchboard Corporation
  • Switchboard Apparatus

With EMSCO, you get more than products; you get options tailored to your industrial power needs.

Expert Guidance Every Step of the Way

With over a century of combined sales experience, our team at EMSCO knows switchgear inside and out. We understand that finding the right switchgear components can feel overwhelming, especially when time is of the essence. That’s why our dedicated experts are here to guide you. Whether you need help choosing the right fit for your project or need a quick turnaround, we’re ready to deliver with personalized service and a commitment to your satisfaction.

The EMSCO Advantage: Tailored Solutions, Unmatched Inventory, and Outstanding Service

When you choose EMSCO, you’re not just buying parts—you’re securing a partnership. Our massive inventory, deep industry knowledge, and dedication to customer care set us apart. From switches and breakers to mounting hardware and everything in between, EMSCO has what you need to keep your power distribution systems running smoothly.

Ready to see how EMSCO can power up your project? Contact us today and experience the EMSCO difference firsthand!


Browse our selection of Low and Medium Voltage Switchgear